Mastering Underwater Photography: A Complete Guide for Stunning Shots
Underwater photography can be both exhilarating and challenging. The underwater world is filled with vibrant colors, fascinating textures, and captivating creatures, making it a dream for photographers. Whether you’re diving in the clear waters of the Caribbean or exploring the depths of a local lake, capturing the beauty below the surface requires special skills, knowledge, and equipment. In this comprehensive guide, we’ll walk you through everything you need to know about underwater photography, from choosing the right gear to perfecting your technique.
1. Understanding the Basics of Underwater Photography
Underwater photography differs significantly from terrestrial photography due to the unique challenges posed by water. When light passes through water, it is absorbed at different rates depending on the color and depth, affecting how images appear. The deeper you go, the more colors are filtered out, leaving your photos looking increasingly blue or green. Additionally, water also causes light to scatter, creating a hazy effect that can reduce sharpness.
In general, underwater photographers need to focus on a few key factors:
- Light: Water absorbs light quickly, and natural sunlight diminishes as you go deeper.
- Visibility: The water conditions—whether clear or murky—greatly influence how well you can capture your subject.
- Movement: Movement, whether from the subject or yourself, can easily blur the image. Buoyancy control is critical.

2. Choosing the Right Equipment for Underwater Photography
Underwater photography requires specialized equipment to ensure you get high-quality images without compromising safety. Below is a breakdown of the essential gear you’ll need:
a. Camera and Waterproof Housing
Most professional-grade cameras are not waterproof by default, so investing in a waterproof housing is necessary. Many reputable camera manufacturers offer underwater housings tailored to their camera models, providing controls and buttons to operate your camera while keeping it safe from water. Make sure the housing is tested to the depth you plan to dive.
There are also compact underwater cameras available, especially useful for beginners. These cameras often come with built-in waterproof features and are more portable.
b. Lenses
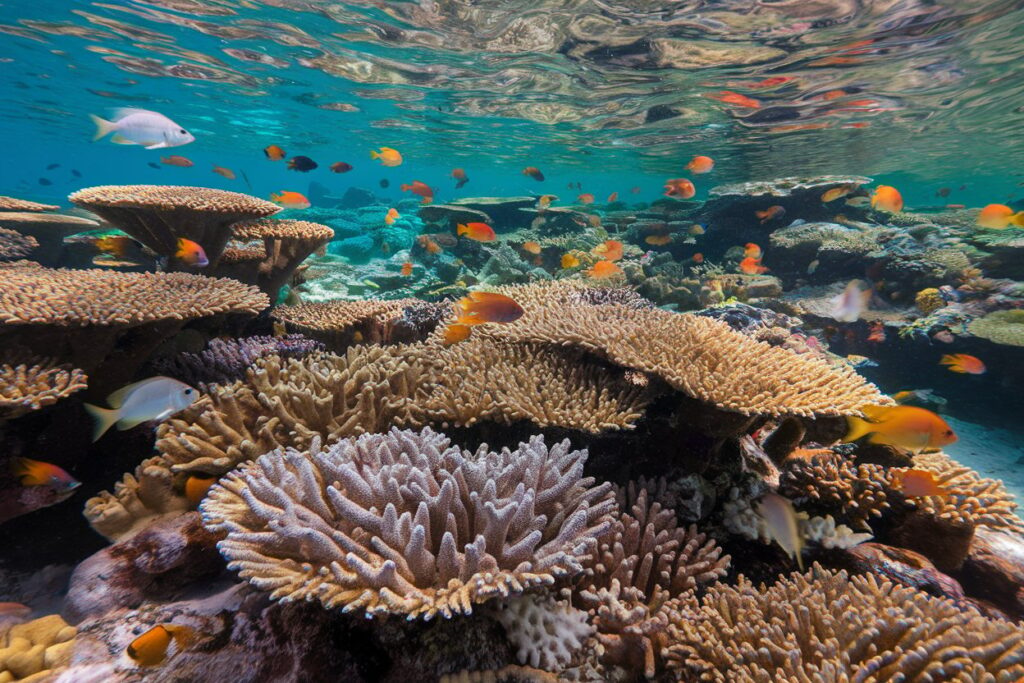
Lenses play a significant role in underwater photography. A wide-angle lens is best for capturing expansive seascapes or coral reefs, as it allows you to fit more of the underwater world into a single shot. In contrast, a macro lens is ideal for close-up shots of small creatures, like seahorses, nudibranchs, or even the intricate details of coral.
For beginners, it’s often easier to start with a wide-angle lens, as it lets in more light and provides better visibility in murkier water.
c. Strobes and Flashes
Light is one of the biggest challenges in underwater photography. As water absorbs sunlight, your images can appear dull and lifeless. This is where strobes or flashes come in. These external light sources help illuminate the scene, allowing you to capture sharp, vibrant images. Strobes are particularly effective when photographing marine life at depth or in low-light conditions.
When using strobes, be mindful of the angle and distance from your subject. If positioned too close, the flash can cause overexposure or create harsh shadows. Aim to position the strobes at an angle from your camera to avoid these issues.
d. Filters
Underwater filters, such as red or magenta filters, are designed to restore natural colors that are lost when diving to greater depths. These filters work by compensating for the water’s absorption of certain wavelengths of light. A red filter, for instance, helps correct the blue or green tint that is often found in deeper waters, giving your photos a more natural and vibrant appearance.
e. Buoyancy Control Devices (BCD)
Proper buoyancy control is essential for underwater photography. Using a BCD or other diving gear helps you maintain steady control over your position in the water. This is important not only for your safety but also to ensure your shots are sharp and free from motion blur. With buoyancy control, you can hover in place and shoot without touching the bottom or disturbing the environment.

3. Key Camera Settings for Underwater Photography
The settings you use in underwater photography are crucial to achieving the best results. Here are some camera settings that are particularly important when shooting beneath the surface:
a. Aperture (f-stop)
The aperture controls the amount of light that enters your camera, as well as the depth of field. A larger aperture (smaller f-number) lets in more light, which is essential when shooting in dimmer underwater environments. However, be mindful of the depth of field: a large aperture creates a shallow depth of field, which can cause your background to blur.
If you’re shooting close to your subject, use a smaller aperture (higher f-number) to ensure both the subject and background are in focus. If you’re capturing wide-angle shots, a larger aperture will help achieve a more dramatic look.
b. Shutter Speed
A fast shutter speed helps freeze motion and ensures sharp images, especially when photographing fast-moving subjects like fish or sharks. A slow shutter speed, on the other hand, can create a sense of motion by blurring the subject, which can be effective for capturing the fluid movement of water.
In general, aim for a shutter speed of 1/125 or faster for most underwater shots, especially when photographing moving subjects. If you’re photographing still subjects or landscapes, you can opt for slower shutter speeds.
c. ISO
In low-light conditions, you may need to increase your ISO to avoid underexposed images. However, high ISO settings can introduce noise, which can be distracting in your photos. To maintain image quality, try to keep your ISO as low as possible while still achieving a proper exposure. In general, aim for an ISO setting between 200 and 800, depending on your depth and light conditions.
d. White Balance
White balance is crucial for correcting the color temperature in your images. Underwater, natural light is often filtered and absorbed, making your photos appear blue or green. To restore natural colors, adjust your white balance to an underwater setting or manually set it to match the light conditions.
Many underwater photographers recommend shooting in RAW format to have greater flexibility during post-processing, where you can fine-tune white balance and other settings.

4. Techniques for Stunning Underwater Shots
Now that you’ve got your equipment and settings dialed in, it’s time to focus on the techniques that will help you capture stunning underwater images. Here are some expert tips:
a. Get Close to Your Subject
One of the cardinal rules of underwater photography is to get as close to your subject as possible. Water naturally scatters light, which reduces image clarity the farther you are from your subject. By getting closer, you’ll capture more detail and preserve color vibrancy.
When shooting marine life, try to get within a few feet of your subject. If you’re capturing wide-angle shots, keep your camera as close as possible to the scene without disturbing the environment.
b. Control Your Movement
Moving too quickly or erratically underwater can cause your photos to appear blurry. To avoid this, practice controlled movements. Use your fins to glide smoothly through the water and avoid making sudden jerks that could disrupt your shots. Buoyancy control is key here, as it allows you to maintain a steady position while shooting.
c. Pay Attention to Lighting
Lighting plays a significant role in underwater photography. Natural light is strongest in shallow waters, so try to shoot in these areas when possible. When diving deeper, use strobes or artificial lighting to fill in the shadows and bring out the colors of your subject.
Be mindful of the direction of the light. Ideally, position your camera so that the light hits your subject from the side or behind, rather than directly from the front, to avoid harsh shadows and overexposure.
d. Focus on Composition
Composition is just as important underwater as it is in any other form of photography. Keep the rule of thirds in mind, placing your subject off-center for a more dynamic shot. Use leading lines, such as the edge of a reef or the silhouette of a fish, to guide the viewer’s eye through the image.
Additionally, be aware of the background. A cluttered or distracting background can detract from your subject. Position yourself to find clean, uncluttered backgrounds, such as open water or simple coral formations.
e. Be Patient
Underwater photography often requires patience. Unlike terrestrial photography, where you can position your subject, underwater subjects tend to move unpredictably. Whether it’s a school of fish or a solitary sea turtle, it may take time for the subject to approach or position itself just right for a perfect shot.
Take your time and observe your environment. If a subject is shy or elusive, wait patiently for it to come closer, and be ready to capture the moment when it does.

5. Post-Processing Underwater Photos
Even the most experienced underwater photographers rely on post-processing to enhance their images. Here are some techniques to help you fine-tune your photos after the dive:
a. Adjust White Balance
If your images still have a blue or green tint after adjusting the white balance underwater, you can fine-tune the colors in post-processing. Programs like Adobe Lightroom or Photoshop allow you to adjust the white balance further, making the colors look more natural.
b. Increase Contrast and Saturation
Underwater images often benefit from increased contrast and saturation. Boosting these settings will make the colors pop and give your photos more depth and clarity.
c. Sharpen the Image
The scattering of light underwater can cause images to appear slightly soft. Use sharpening tools in post-processing software to bring out fine details, especially in the texture of coral or the scales of fish.
6. Safety Considerations for Underwater Photography
While underwater photography can be a lot of fun, safety should always come first. Here are some important safety tips to keep in mind:
- Always dive with a buddy and adhere to safe diving practices.
- Make sure your camera housing is securely sealed before entering the water.
- Avoid touching marine life or disturbing the environment. Many species are delicate and easily harmed.
- Be aware of your surroundings and keep an eye out for potential hazards, such as strong currents or predators.
Conclusion
Underwater photography is an exciting and rewarding pursuit that opens up a whole new world of creativity. With the right equipment, techniques, and a bit of practice, you can capture stunning images that showcase the beauty and wonder of life beneath the surface. By following these tips and continually honing your skills, you’ll be well on your way to becoming a master of underwater photography.

